
Flowers
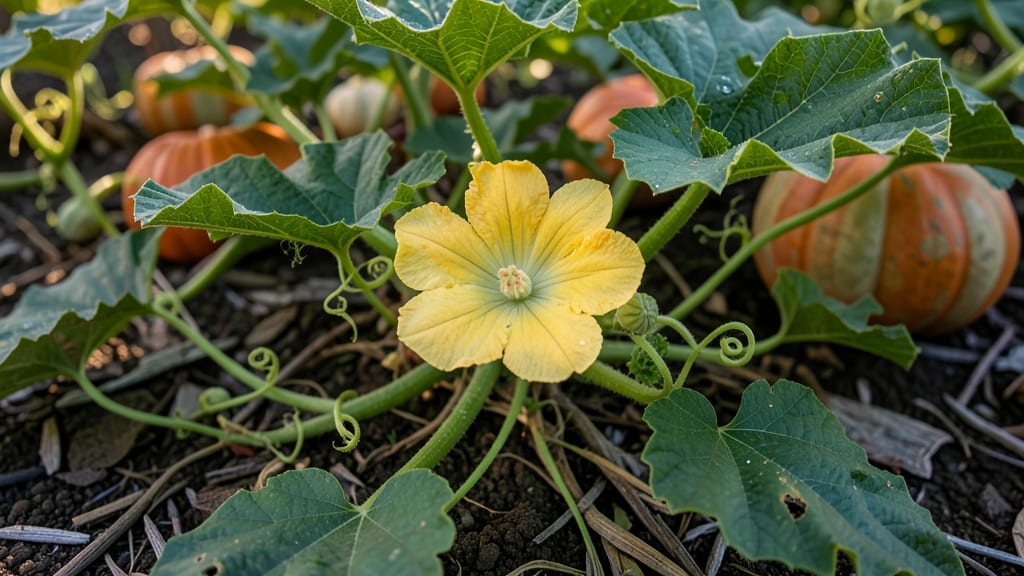
When your female pumpkin flower 🎃 wilts after pollination, it’s not a sign of failure—it’s the first step toward a future harvest. This subtle change marks the beginning of fruit development, where the ovary swells and transforms into the pumpkin you’ve been waiting for.
Understanding what happens next can mean the difference between a thriving vine and missed opportunities. I’ll break down the visual cues, from wilting petals to fruit formation, so you can recognize a successful pollination within days.
Even small details, like how long it takes for the ovary to harden, play a crucial role.
But here’s the catch: not all pollinated flowers result in fruit. Learn the key signs of healthy fruit set and how to support your pumpkins during this critical stage. Proper care—like watering, pruning, and pest control—can boost your chances of a bountiful harvest.
Whether you’re a seasoned gardener or just starting with pumpkins in Zone 6, these insights will help you maximize your yield. Let’s dive into what happens after pollination and how to ensure your pumpkins grow strong.
What happens to female pumpkin flowers after successful pollination
After a female pumpkin flower is successfully pollinated, its transformation is both dramatic and fascinating. Within 24-48 hours, you’ll notice the flower’s petals begin to wilt and drop, signaling the start of fruit development.
This isn’t failure—it’s nature’s way of redirecting energy from blooms to the growing ovary. The swollen ovary at the flower’s base will soon become your pumpkin’s foundation, expanding rapidly as nutrients flow in.
The first 7-10 days post-pollination are critical. The ovary swells visibly, often doubling in size within a week. During this phase, the flower’s stem may turn slightly woody, and the base will firm up.
If you’ve ever wondered why some flowers fail to set fruit, this stage reveals the answer: poor pollination or nutrient deficiencies cause the ovary to shrivel or drop off instead.
During the early fruit formation phase (days 3-10), the ovary transforms into a tiny pumpkin. This is when you’ll see the most dramatic growth—sometimes up to 1 inch per day in ideal conditions.
The fruit’s skin may appear fuzzy or waxy at first, but it will soon harden as cellulose builds up. If you notice small fruits dropping during this window, it’s often due to inconsistent watering or temperature fluctuations below 70°F.
By day 14-30, the pumpkin enters its rapid growth phase. The fruit’s weight causes the vine to sag slightly, and you’ll see visible veins developing on the skin. This is also when pests like squash bugs become a threat—check the undersides of leaves daily for eggs or adults.
A neem oil spray applied every 7-10 days can prevent infestations before they damage young fruit.
The maturation stage (days 30-90+) is where patience pays off. The pumpkin’s rind thickens, and its color deepens—from pale green to the vibrant orange or deep green of its variety. The vine may start to yellow and die back, signaling it’s redirecting energy to the fruit.
If you’re growing heirloom varieties, like Cinderella or Jarrahdale, expect larger fruits with longer maturation times (up to 120 days).
One common mistake gardeners make is pruning pollinated flowers too early. The first 30 days are critical for fruit establishment—removing flowers or vines during this window can starve developing pumpkins of nutrients.
Instead, focus on supporting the vine with a trellis or cage if needed, and avoid heavy pruning until the fruit is at least golf-ball sized.
To ensure healthy development, maintain soil moisture without waterlogging. Pumpkins need 1-2 inches of water weekly, but their roots are shallow, so drip irrigation is ideal. Avoid overhead watering, which can spread powdery mildew—a fungal disease that thrives in damp conditions.
If you notice white powder on leaves, treat immediately with baking soda spray (1 tsp baking soda + 1 quart water + drop of dish soap).
By understanding these stages, you’ll know exactly what to expect—and when to intervene. A successfully pollinated female flower isn’t just a pretty bloom; it’s the promise of a harvest.
With the right care, your pumpkin patch can go from wilted petals to homegrown bounty in just a few months. 🎃
How to tell if pollination worked: key visual clues and timing
After successful pollination, your female pumpkin flower will show clear visual changes within 24-48 hours. The most obvious sign is the wilting of the petals, which may drop off completely.
This isn’t failure—it’s nature’s way of redirecting energy to the developing fruit. The ovary at the flower’s base will begin swelling almost immediately, signaling the start of fruit formation.
Pay close attention to the fruit’s growth rate in the first week. A healthy pollination will show a noticeable enlargement of the ovary within 3-5 days. If the ovary remains small or shrinks, pollination may not have taken.
This early stage is critical, as it determines whether your pumpkin will thrive or fall off the vine.
⚠️ callout-warning
Many gardeners accidentally remove newly pollinated flowers when pruning. The female pumpkin flower wilts naturally after pollination—this is normal! If you prune too early, you risk losing potential fruit. Wait 7-10 days to confirm fruit set before pruning. Look for a swollen ovary (future pumpkin) as your green light to prune safely.
The next 48-72 hours are your best window to verify success. Gently touch the ovary—if it feels firm and slightly enlarged, pollination worked. A soft or shriveled ovary means fertilization failed.
This quick check helps you avoid wasting resources on doomed flowers. I always mark pollinated flowers with a small flag to track their progress.
By day 7, you should see a small pumpkin bump forming where the ovary was. This bump will grow rapidly, doubling in size within 10-14 days. If no bump appears, the flower wasn’t pollinated.
Keep an eye on your plants—healthy fruit set means fewer resources wasted on failed blooms and more energy for strong pumpkins.
Timing is everything when it comes to fruit development. If you notice wilting without ovary swelling, check for pollen transfer issues or poor weather conditions. Humidity below 60% or temperatures above 90°F can hinder pollination. In these cases, manual pollination with a paintbrush may be needed to ensure success.
Once you confirm fruit set, shift your focus to supporting growth. Increase watering to 1-2 inches per week and avoid heavy fertilizing, which can cause bitter fruit. Mulch around the base to retain moisture and protect young pumpkins from pests.
With proper care, your pollinated flowers will develop into the harvest-ready pumpkins you’ve been waiting for! 🎃