
How To
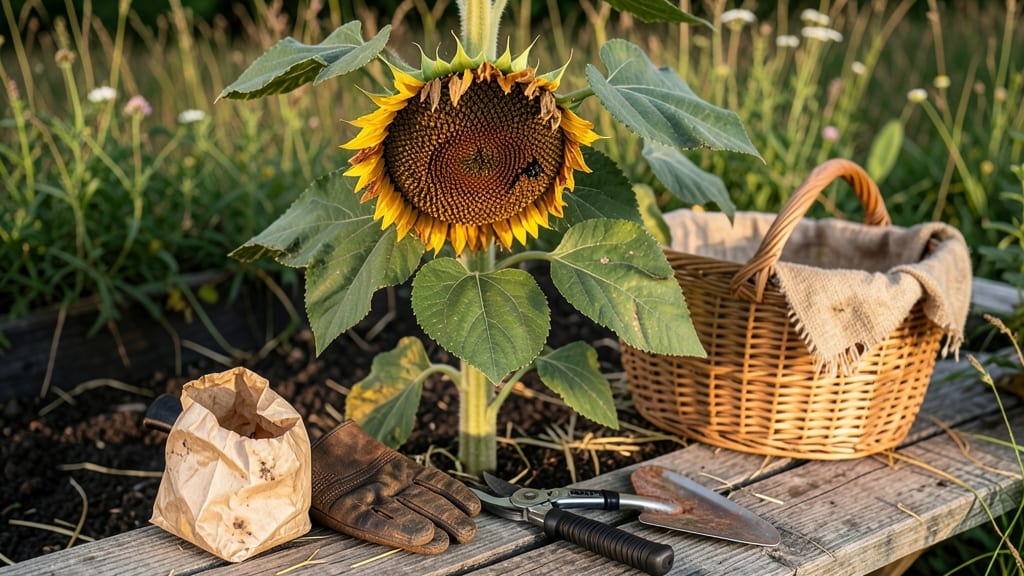
Knowing when sunflower seeds are ready to harvest can turn a wasted effort into a perfect harvest—because those golden seeds won’t wait forever. The moment you miss it, they’ll shatter or spoil, leaving you with nothing but empty husks.
I’ve learned the hard way that timing is everything, and the clues are right there in front of you if you know what to look for.
Most gardeners wait for the back of the seed head to turn brown and dry, but there’s more to it than that. The petals should wilt completely, and if you shake the flower head, you’ll hear those seeds rattling inside like a tiny drum.
This is your cue that nature’s ready to share its bounty. But here’s the catch: if you’re even a day late, those seeds scatter faster than you can say “sunflower.”
In USDA Zone 6a, where frost can sneak up by October, timing matters even more. You’ll need to act before the first chill sets in—or risk losing your harvest to the elements. The good news?
Once you master these simple visual and physical checks, you’ll never second-guess when to harvest again. Let’s break down exactly what to watch for so you can pull those seeds at the perfect moment.
From the classic “back-of-head” test to the telltale rattle of mature seeds, I’ll walk you through every step—plus what to do if you’re unsure. By the end, you’ll know exactly when to reach for your pruners and how to store your harvest for months to come.
No more guesswork, just golden seeds ready for the table or the bird feeder.


The back-of-head test and other visual signs of sunflower seed ripeness
When my sunflowers reach their towering 8-foot glory, I know the harvest window is near—but how do I know exactly when those seeds are ready? The answer lies in a few simple visual cues that most gardeners overlook.
The most famous is the back-of-head test, where the seed head turns from green to a rich, papery brown. This isn’t just about color, though. It’s about the texture, the sound, and even the petals telling you their story.
First, let’s talk about the petals. When they’re fully mature, they’ll droop dramatically and turn a dull, brownish hue—almost like they’ve given up all their energy to the seeds below. If you see bright yellow petals still standing tall, your seeds aren’t ready yet.
This is nature’s way of saying, “Not yet—wait a little longer.” The petals are the first to show their true colors, and ignoring them means risking underripe seeds that won’t store well.
Now, here’s where things get interesting: the back-of-head test. This is the moment you’ve been waiting for. Run your fingers along the seed head’s back—it should feel completely dry and papery, almost like crinkled brown paper.
If it’s still slightly green or damp, your seeds need more time. This test is your golden ticket to knowing when the seeds inside are fully mature and ready to be harvested. Skipping this step often leads to moisture-laden seeds that spoil quickly.
How to Know When Sunflower Seeds Are Ready to Harvest
- 1. Petals Wilt and Turn Brown – Fully drooped petals signal maturity. Bright yellow petals mean wait longer.
- 2. Back of Seed Head is Dry and Brown – Run your thumb along the seed head’s back. It should feel papery, not green or damp.
- 3. Seeds Rattle When Shaken – Gently shake the flower head. A loud rattling sound means seeds are loose and ready.
- 4. Stem Snaps Easily – A dry stem that snaps when bent is another sign of full maturity.
- 5. Avoid Harvesting Too Late – If the seed head starts splitting open, seeds will scatter before you can collect them.
Don’t overlook the seed head’s firmness. When it’s ready, the entire head should feel light and dry, almost hollow when you tap it. If it’s still heavy or squishy, the seeds inside aren’t fully developed.
This is especially important in humid climates, where moisture can linger longer in the seed heads. A firm, dry head means the seeds have absorbed all the nutrients they need and are ready for harvest.
One of the biggest mistakes I see gardeners make is harvesting too early because they’re eager to collect their seeds. Underripe seeds won’t store well—they’ll either sprout prematurely or develop mold.
On the flip side, waiting too long means the seeds will scatter onto the ground, leaving you with a wasted harvest. The key is to act when the back of the seed head is fully brown and the petals have completely wilted.
This usually happens about 75-90 days after planting, depending on your sunflower variety.
Another trick I use is the finger test. Gently press your fingernail into a seed. If it’s hard and doesn’t dent easily, it’s ready. If it feels soft or mushy, give it a few more days.
This test is quick and gives you instant feedback on whether your seeds are harvest-ready. It’s a simple way to avoid the guesswork and ensure you’re picking seeds at their peak.
Timing is everything, especially when it comes to frost risk. In USDA Zone 6a, where I garden, the first frost can arrive as early as mid-October. If your sunflowers haven’t reached maturity by then, you’ll need to harvest the entire flower head and dry the seeds indoors.
This is why I always keep an eye on the weather forecast and the seed head’s progress—so I’m never caught off guard.
Lastly, pay attention to the seed head’s shape. When it’s ready, the head will start to flatten slightly as the seeds mature and dry out. This is another visual cue that the seeds are nearing harvest time.
If you ignore this, you might miss the window and end up with seeds that are too dry or have already scattered. The shape change is subtle, but once you know what to look for, it’s unmistakable.
By mastering these visual cues—the back-of-head test, the petal color, the seed rattle, and the stem snap—you’ll never second-guess when to harvest again.
These signs work together to give you a clear picture of your sunflower’s readiness, ensuring you collect seeds at their peak maturity for the best storage life and flavor. Now, grab your pruners and get ready to harvest!
How to test sunflower seed hardness and moisture content for harvest readiness
Once your sunflower’s petals have wilted and the back of the seed head turns brown, it’s time to dig deeper—literally. The hardness test and moisture check are your next steps to confirm those seeds are truly ready.
I’ve found that skipping these can lead to either underripe seeds that won’t store well or overripe seeds that shatter before you can harvest them. Let’s break down the two critical tests every gardener should master.
The nail test is the simplest way to gauge seed hardness. Simply press your fingernail into the back of a seed head. If it feels firm and dry—almost like pressing into a walnut—your seeds are ready. If it gives slightly or feels slightly damp, they need more time.
This test is foolproof because it tells you whether the seeds have fully matured and dried on the plant. I’ve used this method for years, and it’s never steered me wrong.
Next, check the moisture content by snapping off a small section of the seed head. Split it open and look inside: the seeds should feel dry and papery, not sticky or moist. If they’re still slightly damp, leave them on the plant for another 3-5 days.
Overripe seeds will be dry and brittle, but they’ll also start scattering on their own, so act quickly if you see seeds falling to the ground.
⚠️ Warning: Overripe Seeds Are a Risk!
If you miss the harvest window, overripe seeds become a major problem. They’ll scatter uncontrollably when touched, making collection nearly impossible. Even worse, they may attract pests like squirrels or birds before you can gather them.
In USDA Zone 6a, where frost arrives by mid-October, timing is critical—don’t wait until the first frost hits, or your seeds could spoil.
Pro Tip: Harvest on a dry, sunny day to speed up drying and prevent mold. If rain is forecasted, bring your seeds indoors immediately to dry.
For storage vs. immediate use, the rules differ slightly. If you plan to eat the seeds right away, they can be slightly softer—just ensure they’re fully dried to avoid spoilage.
But for long-term storage, aim for the hardest, driest seeds possible. Store them in an airtight container in a cool, dark place to maintain viability for up to a year.
One mistake I’ve seen gardeners make is harvesting too early because the petals look wilted. But if the seed head is still green or the seeds don’t rattle when shaken, they’re not ready.
Patience is key—wait until the entire back of the head is brown and the seeds sound like a dry rattle when you shake it. This combo means your seeds are prime for harvest.
Finally, if you’re unsure, cut the flower head and hang it upside down in a dry, well-ventilated spot for a few days. This mimics natural drying conditions and gives you extra time to confirm ripeness.
Once fully dry, the seeds will pop out easily, leaving you with a bountiful harvest ready for storage or snacking.